

How To Hook Up Keurig To Water Line
How To Connect Whatsoever Keurig To a Water Line!
Have you ever wondered if there was a "better manner" to refill your Keurig reservoir? Well, you Tin! Learn how to connect your Keurig brewer to a direct water line and bask hassle-free refills each and every fourth dimension!
To me refilling something is no big bargain….just perchance in some cases, it could make your life easier depending on your ain situation. Maybe you use that thing more than heavily needing to manipulate hot water at odd times of day for food items, or perhaps you're someone who has some physical limitations (similar arthritis, or wheelchair bound)
Or possibly the "Add Water" calorie-free coming on persistently (and sometimes reading falsely) is getting to exist a pain in the you know what. Well, the good news is that some people are figuring this out and hacking the reservoir.
And YOU tin can, too! So let's swoop in!

Table of Contents
- How To Connect Any Keurig To a Water Line!
- Tin All Keurig Models Be Hooked Up To a Water Line?
- Materials Listing
- How "Hacking the Reservoir" Works
- Getting Started
- Install the Float Valve
- Installing Tubing For the Water Line
- Connecting the Tubing
- Testing It Out
Can All Keurig Models Be Hooked Upwardly To a Water Line?
Yous don't actually take to own the Keurig K150 or K155 with the direct plumbing line already established to make this piece of work. The Classic, Elite and Platinum editions can exist hacked with a water refill system too! Just abut all of them with the exception of the Mini or the Keurig K130 DeskPro, exist plumbed. Information technology does require a different gear up of tools than for the units mentioned before.
Doesn't just have to be a Keurig either! Any one thousand-cup brewer (with a reservoir) can be hacked 👌
Warning: There are two important caveats here: 1) This does take some legwork, and 2) This process may void the warranty on your Keurig. Now that I've established that, let's lay it out there.
Materials List
MOST Pop

See On Amazon This model was rated the most highly by users
How "Hacking the Reservoir" Works
The float valve I establish to the left, that you will need is one fabricated for aquarium use. Information technology has a like purpose (and design) to the accessory part by the same name used in your toilet tank. Yet it's a lot smaller.
(It's going to literally float atop the water in your reservoir, so naturally it's going to be small.)
Basically the performance will be the same -when you lot brew cups of coffee, the water reservoir volition refill back up much like your toilet tank does when it is flushed.
Your modus operandi will be hooking this apparatus upwardly to a h2o line that connects to another direct h2o source -say, your refrigerator. Hopefully this sounds heady to you lot and not too scienc-y 🙂
Getting Started
First I'm giving praise and credit to thismail service past a java drinker who has pulled this off like a real pro. A big thank-you to the author for giving me permission to use some of his photos here when I inquired 😊 Plagiarism is not cool (and dishonest) so I paraphrased the major points.
First decide the place of the water hookup – Backside the refrigerator seems like the obvious choice, but there are other options. It volition all depend on your situation. and whatever room y'all employ the brewer the most.

If you look behind your fridge yous should see your water line hands.The average diameter for almost domicile h2o lines is abut 1/4″ in diameter.
Install the Float Valve
First determine the place for the hole to go -information technology needs to be in a sure location so that the bladder valve is in the right place. I know this is tricky considering Keurig reservoirs take that roundish-semicircular shape-so you lot may want to experiment with the valve placement and meet how much it will movement under the reservoir lid before you make your marking. When you lot have the designated spot, marker it on the outside with a piece of record on the area and a Sharpie.
Drill on the outside of the hat and to farther protect your reservoir lid (it's plastic and you have to be uber careful with drilling in plastic) place a slice of tape over the designated area.
Tip: Use of a footstep flake
 Now take your float valve and twist off the band nut (it's close to the superlative) and thread it over the poly tubing. Thread the neck of the bladder valve into the hole you lot made in the reservoir hat and bank check for movement. The neck function that is showing on the outside, should be secured with the band nut.
Installing Tubing For the H2o Line
A shutoff valve volition be important on those occasions yous demand to halt the h2o flow when descaling (yeah, yous'll still have to do this!) or well,.. White potato's Police force. It needs to accommodate the same tubing thickness, 1/4″

Shutoff valve
Before you go on with connecting the tubing going into the float valve to the tubing that will pb to the water line, temporarily close off your water supply. (When I last had to exercise this, it is in the front one thousand, I take something called a "church key" and twist it clockwise)
Connecting the Tubing
Sandpaper the ends of your tubing…Thread 1 cease into the ring nut end going into the Keurig and push the compression nut over it. Connect this length of tubing into the brass shutoff fitting and tighten.

Teflon tape
Wrap a few rounds of teflon record 
You're so going to insert the contrary end of the tubing into the three way connector fitting. Again button in the tubing until it stops and secure with teflon tape.

Iii fashion connector
Thread the other tubing piece into the h2o line and the other end into the iii manner plumbing fixtures.
When everything is continued and secure you can turn the water back on and do a little checking of the fittings if necessary.
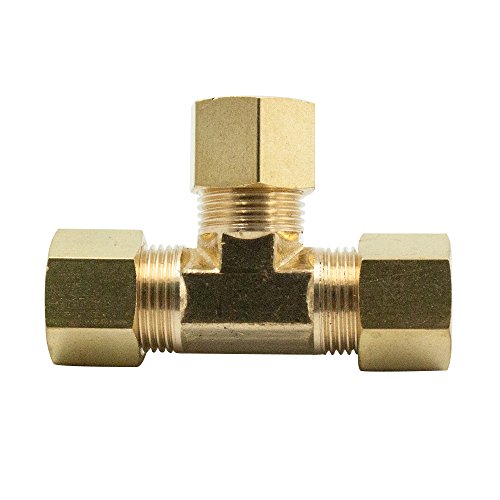 Legines Contumely Compression Plumbing fixtures, Tee Union, 3 means Connector, 1/4
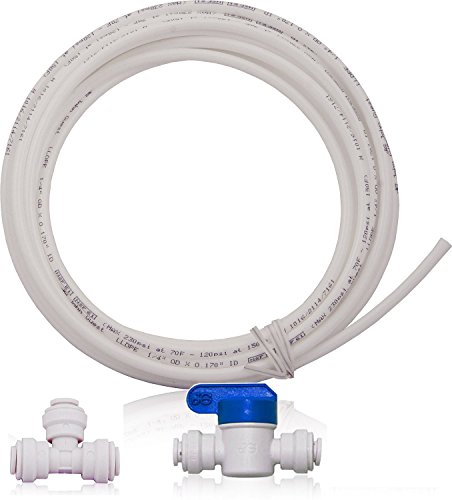 DRINKPOD USA ICEMAKER-KIT JG i/iv inch PVC Line & JG Parts
 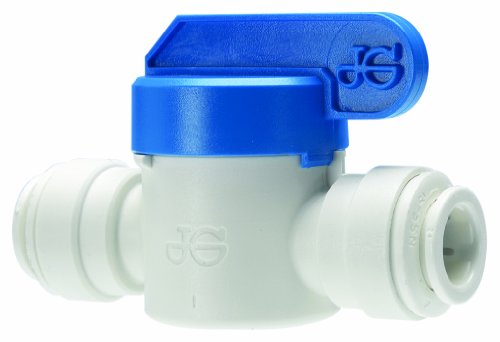 John Guest PPSV040808WP Unmarried Straight Shut-Off Valve, 1/4
Testing It Out
Alright…Now to meet if your work has passed the smell examination there are several steps involved. Outset brewing a bike and bank check for the following: Offset off, there should be no leaks. If you lot see water flowing into the tube but a slight trickle out, you may need to wrap the connector fittings with a lilliputian more teflon tape.
Number two…As the coffee brews into your cup does the corporeality of h2o you used for your coffee automatically re-period back into the reservoir so stop (very much similar the style in which your toilet tanks refills and and so stops when full)
Here is a video and then you lot can see what this baby volition await like when all is said and washed!
If so…Swell!! Congratulations, you take successfully rigged your reservoir! At this point you should treat yourself to your favorite brand of coffee. You have earned it!
Good luck to yous – Did you find this post helpful? Permit me know in the comments 😊☕️.
Top image Attribution: Creative Commons Image Courtesy of Moresheth

How To Hook Up Keurig To Water Line,
Source: https://bestcoffeemakersinfo.com/connect-keurig-to-a-water-line
Posted by: sullivanrefereall.blogspot.com
0 Response to "How To Hook Up Keurig To Water Line"
Post a Comment