

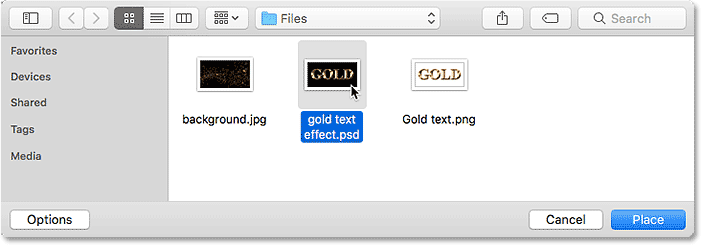
How To Make The Background Of Text White And Blacke Writing In Photoshop
In this tutorial, I answer one of the about popular questions I'm asked, which is, how do yous save a text upshot with a transparent groundwork and so you can motility the effect onto a different background? Normally when creating a text effect in Photoshop, we create it on a simple colored background, usually black or white. Merely once the outcome is done, we often want to move it onto a different background, which means we need a way to remove the original groundwork and replace it with transparency. So how do we do that? Information technology's actually very easy, and in this tutorial, we'll learn three ways to do it.
I'll be using Photoshop CC simply whatsoever recent version will work. Let's get started!
The text effect
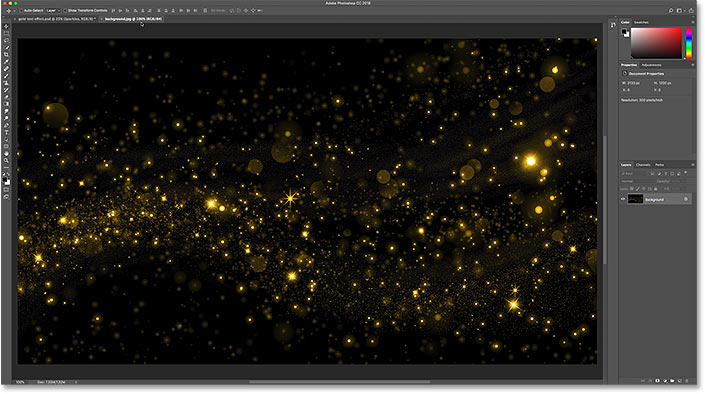
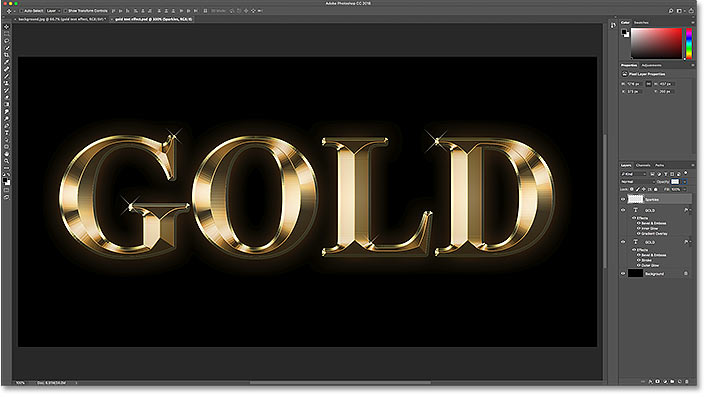
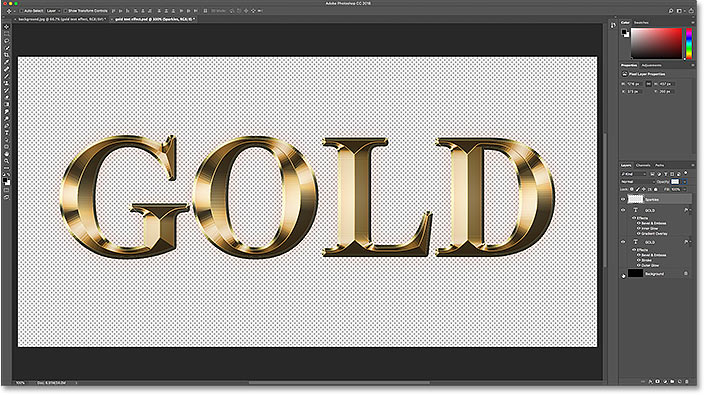
Here'due south the text result I'll exist using. I show you how to create this gold text in a split up tutorial. Notice that the effect is sitting on a black background:

The original text effect on a black background.
The new groundwork
And here'southward the new groundwork I desire to place the text into. I downloaded this one from Adobe Stock:

The new groundwork for the result.
How to make the background transparent
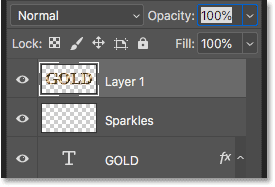
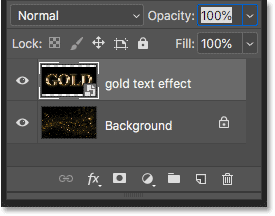
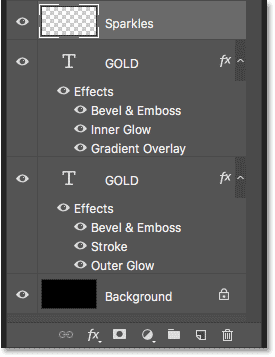
I'll switch back over to my text effect. And if we await in the Layers panel, nosotros see the three layers that make up the effect. We take the "Sparkles" layer on superlative, and the two Type layers beneath it. We besides take the Background layer on the bottom that'south filled with black:
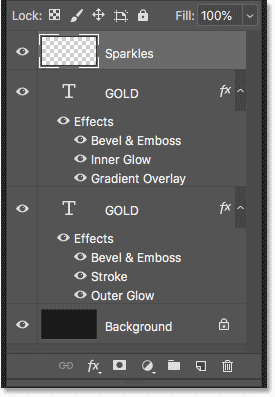
The text effect layers, plus the Background layer.
Turning off the Background layer
The first thing we need to do is remove the original background and replace information technology with transparency. To hide the background, merely turn the Background layer off by clicking its visibility icon:
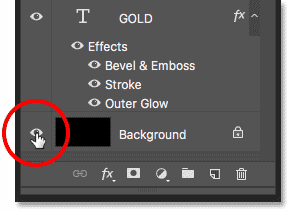
Turning off the Background layer.
This leaves our text in front of a transparent groundwork. Photoshop represents transparency with a checkerboard pattern:

The background behind the text has been replaced with transparency.
How to motion the text upshot onto a new background
So now that nosotros've made the background transparent, how to we movement the effect onto its new groundwork? There'south a few ways to practise information technology.
Method one: Using the PNG file format
I way is by saving the issue in a file format that supports transparency. The JPEG format doesn't support transparency, so information technology'southward not going to work. But the PNG format does, and that'due south the format we need.
How to salve the outcome as a PNG file
To save your text effect as a PNG file, get up to the File menu in the Menu Bar and choose Save As:
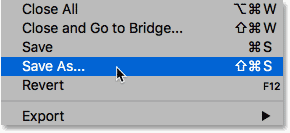
Going to File > Relieve As.
In the dialog box, name your file (I'll name mine "Gold text"), and so set the Format to PNG. Choose where you want to salvage it, and and then click Salvage:
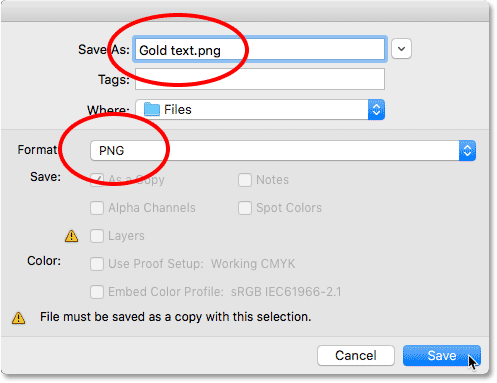
Saving the text effect as a PNG file.
Setting the PNG format options
Photoshop will enquire you to cull a compression setting for the PNG file. This volition look different depending on which version of Photoshop you're using, but I always cull the option for the smallest file size. Click OK to shut the dialog box:
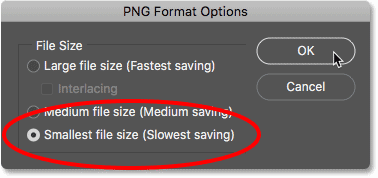
Choosing the smallest file size option.
Opening your new background
With the file saved, open up your new background:
Opening the new background image.
Placing the PNG file into the document
Go up to the File menu and, in Photoshop CC, cull Place Embedded. In Photoshop CS6 or earlier, choose Place:
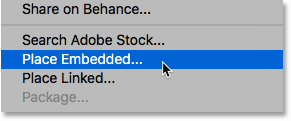
Going to File > Place Embedded.
Choose the PNG file you only saved, and then click Place:
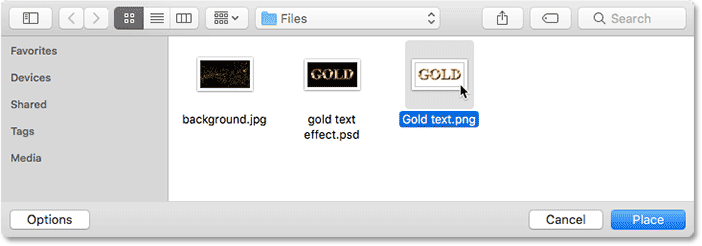
Choosing the PNG file.
Photoshop places the file in front of the background:

Placing the file into the document.
Y'all tin use the Free Transform handles to resize the text if needed. Only in my case, I'll just accept information technology by pressing Enter (Win) / Return (Mac) on my keyboard. And just similar that, the text effect has been moved to its new background:

The text appears in front of its new background.
If we look in the Layers panel, we run across that our text effect has been added equally a smart object to a higher place the image. We know information technology's a smart object by the icon in the lower correct of the thumbnail. A neat thing well-nigh smart objects is that nosotros tin resize them without whatever loss in quality. You can learn more than about resizing smart objects in a split tutorial:
Photoshop placed the file every bit a smart object.
Method 2: Copy and paste
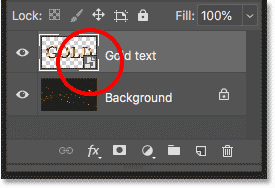
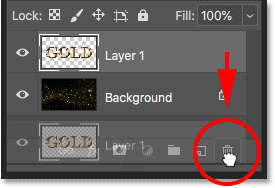
So that's one style to move a text result onto a new background. Let's expect at a second way, and ane where there's no demand to save your certificate as a separate file. I'll delete my effect by dragging it down onto the Trash Bin at the bottom of the Layers panel:
Deleting the text result.
This leaves me with just my groundwork prototype:
Merely the background image remains.
I'll switch over to my text effect document, and because the Groundwork layer is withal turned off, we're withal seeing the transparent background backside the text:
Switching back to the text upshot.
Merging the text event onto a new layer
Another way to move your effect onto a new background is by copying and pasting it into the other document. To make it easier, nosotros'll merge the layers that brand upwards our text upshot onto a new layer.
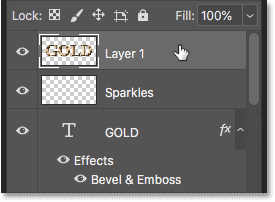
First, make sure your Background layer is turned off so you're seeing a transparent background backside the text. Then click on the superlative layer to select information technology:
Selecting the height layer (with the Groundwork layer turned off).
To merge your text effect onto a new layer, on a Windows PC, press Shift+Ctrl+Alt+E on your keyboard. On a Mac, press Shift+Control+Selection+Due east. This merges all visible layers onto a new layer higher up them. This new layer holds the text effect and nothing else:
The text event has been merged onto a single layer.
Make sure the merged layer is selected, and then go up to the Edit menu and choose Re-create:
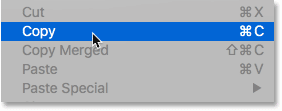
Going to Edit > Re-create.
Open your new background image:
Switching to the new background.
And so get support to the Edit menu and choose Paste:
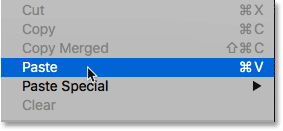
Going to Edit > Paste.
Photoshop pastes the text event onto the new groundwork:
The event after pasting the text effect layer into the new document.
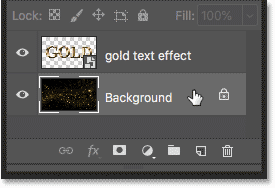
In the Layers panel, nosotros see our text upshot layer higher up the prototype. This time, it's but a normal layer, not a smart object:
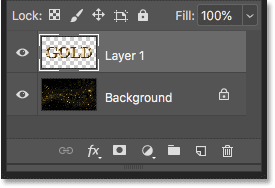
The text outcome layer appears above the Background layer.
Method 3: Placing the text effect document every bit a smart object
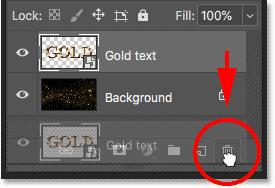
So that's 2 ways to movement a text issue onto a new background. Let's look at 1 more way, which is also my favorite mode. Again, I'll delete my issue by dragging it downwards onto the Trash Bin:
Deleting the text effect layer.
And so I'll switch back over to my text event document:
Switching back to the text issue.
Turning the Background layer back on
Earlier I become any further, I'm going to turn my Background layer back on past clicking its visibility icon in the Layers panel:
Turning the Groundwork layer back on.
This restores the original black groundwork behind the text:
The original background returns.
Deleting the merged text upshot layer
I'll besides delete my merged text result layer by selecting information technology and pressing Backspace (Win) / Delete (Mac) on my keyboard:
Selecting and deleting the merged layer.
Saving and closing the certificate
Now that I've restored the document dorsum to the way it was originally, I'll salve it by going upward to the File menu and choosing Save:

Going to File > Save.
So I'll close my text effect by going back to the File menu and choosing Close:
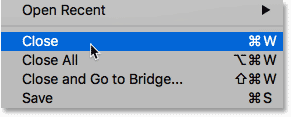
Going to File > Close.
This leaves me with just the new background image:

The text issue document has been closed.
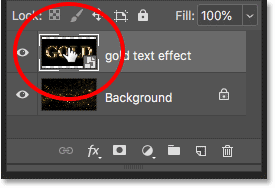
Placing the text effect as a smart object
Earlier, nosotros learned that we could motility our text event onto a new background past turning off the Background layer, saving the consequence as a PNG file, and and then placing the PNG file into the other document as a smart object. But nosotros tin actually place the entire text event certificate itself as a smart object! And the advantage is that the document will remain editable.
To place the text effect document into my background image certificate, I'll go up to the File bill of fare and I'll choose Place Embedded. In Photoshop CS6 or before, I would choose Place:
Going to File > Place Embedded.
This time, instead of choosing that PNG file I saved earlier, I'grand going to choose the text effect's actual Photoshop document (the .psd file). I'll click on it to select information technology, and so I'll click Place:
Choosing the text outcome's Photoshop document.
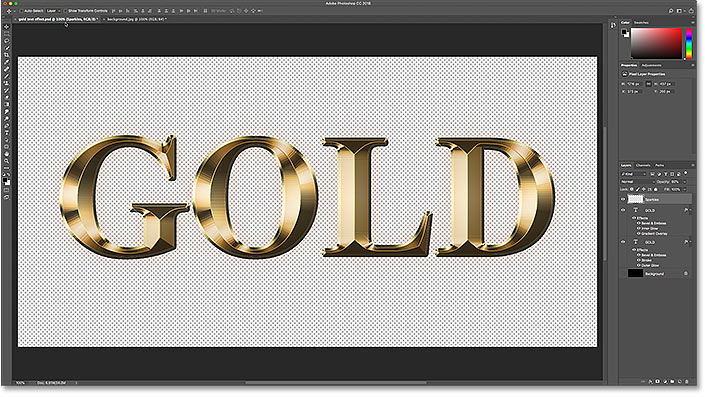
Photoshop places the text effect in front of the groundwork, simply similar information technology did earlier:

Placing the text result document in front of the new background.
Again, we tin resize information technology using the Free Transform handles, but I'll just accept information technology by pressing Enter (Win) / Return (Mac). Observe, though, that the original black background is still showing behind the text, and it's blocking the new background from view. That's because the Background layer was nevertheless turned on. But that's not a problem because it'southward easy to fix:

The text effect has been added, but the original background is still showing.
Editing the smart object contents
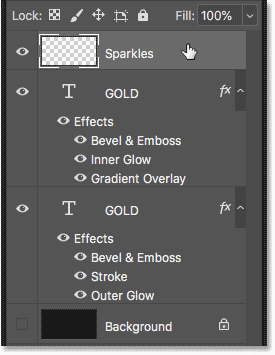
If nosotros look in the Layers panel, we over again run across the text result added every bit a smart object to a higher place the paradigm:
The text effect document has been placed equally a smart object.
But this time, rather than holding a PNG file, the smart object is holding a copy of the unabridged text effect document. To open the smart object and view its contents, double-click on its thumbnail:
Opening the smart object to view the text upshot document.
The text effect opens:
The text effect certificate inside the smart object.
And if we wait in the Layers panel, we see all of our layers withal intact:
The Layers panel showing the text outcome layers and the Background layer.
Turning off the Background layer
To hide the original background, I'll turn off the Background layer by clicking its visibility icon:
Turning off the Background layer.
This once again leaves us with a transparent groundwork:
The background is once once again transparent.
Saving and closing the smart object
To have our alter appear in the chief certificate, we need to salve and close the smart object. To save information technology, go upward to the File carte du jour and choose Relieve:
Going to File > Save.
And then to close information technology, become back to the File menu and cull Close:
Going to File > Close.
And back in the chief document, the original background is at present gone and nosotros see the new background in its place:
The issue after turning off the Groundwork layer in the smart object.
Bonus: Enhancing the consequence
To finish things off, I'm going to employ my background image to quickly raise the sparkle effect around the text. In the Layers panel, I'll select the Groundwork layer:
Selecting the Background layer.
Then I'll brand a copy of the image past pressing Ctrl+J (Win) / Command+J (Mac). The copy appears above the original:
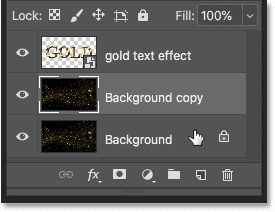
Making a copy of the background prototype.
I'll click on the copy and I'll elevate it up above the text upshot:
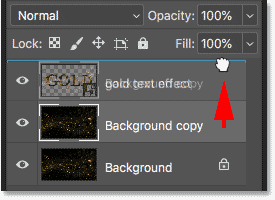
Dragging the copy of the image to a higher place the text.
This temporarily blocks the text from view:
The text upshot is temporarily subconscious.
Finally, to hibernate the areas of black and alloy the gold sparkles in with the text, I'll change the blend mode of the prototype from Normal to Screen:
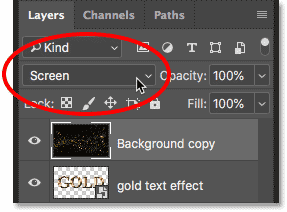
Changing the layer blend mode to Screen.
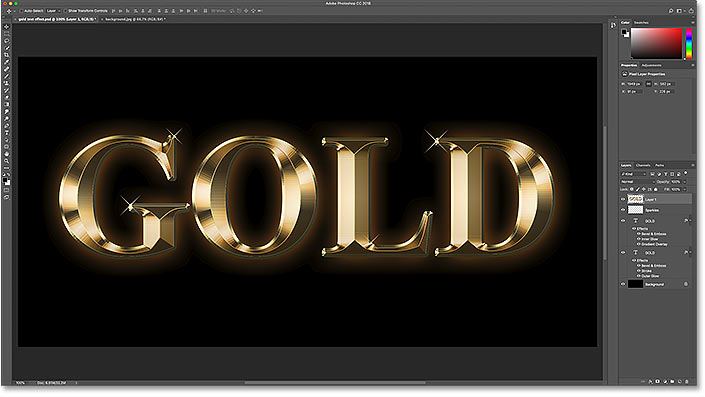
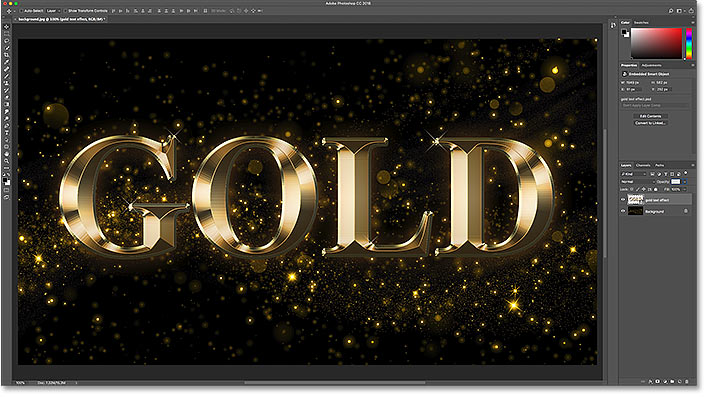
And hither's my final result:

The final, enhanced event.
And in that location we have it! That'due south how to move a text event onto a new groundwork in Photoshop! Acquire how to create the aureate text effect used in this tutorial, or view our Text Effects section for more tutorials! And don't forget, all of our Photoshop tutorials are available to download as PDFs!

How To Make The Background Of Text White And Blacke Writing In Photoshop,
Source: https://www.photoshopessentials.com/photoshop-text/text-effects/remove-replace-text-effect-backgrounds-photoshop/
Posted by: sullivanrefereall.blogspot.com
0 Response to "How To Make The Background Of Text White And Blacke Writing In Photoshop"
Post a Comment